Field Trip!

A Trip to the Apple Store

by  Christopher Rybicki 2016
That's something I never would have expected in high school - going all the way to the Apple Store as part of a school field trip! And though we use quite a lot of Apple products at school as part of our 21st century learning movement, I've never actually been to their flagship store. It turns out it lived up to most of my expectations!

First and foremost, the Apple store is very stylized. They choose to have a very clean, white, modern look that complements most of its products. There were three floors, all organized by the product lines - the first floor had their newest addition, the Apple Watch, along with iPhones. The second floor had MacBooks and iPads, and the third floor had the Genius bar (for customer service) as well as desktops. The third floor is also where we had our workshop.

Here we had a great time learning about some advanced techniques and shortcuts for using Macs. Admittedly, I already knew some of the shortcuts, like Cmd+Q to quit a window or Shift + minimize to show longer animations. But there were a lot of tips I didn't know. Like if you are making a screencast and want to zoom in to parts of your screen, you can use Ctrl+scroll to zoom in and out, once you enable it in accessibility. There were too many to list them all, but it was certainly a lot of information.

From there, we split into groups and created training videos together. At the individual Mac desktops, we were able to try some of the things we learned and make screencasts in specific using the QuickTime player on the Mac. It was especially convenient since we all got Apple EarPods! After thinking of some ideas, Sarah and I decided to make a screencast on Pixelmator. This is an app which I don't have, but I recognized many of the features from other graphic editors of its type. The audio did not work properly when we saved the video, but we were still able to show off a lot of features for drawing and editing photos. Based on our experience, we are going to be trying out the trial for Pixelmator in our help desk class.

It was a long trip to and from the Apple Store, but I certainly enjoyed our time there. As we left, we were finally able to save our videos on special USB bracelets that we received and put our own names on. Though the time felt short, I think it was a pleasant experience and showed insight into the experience of working with tech support in the real world, as there is always a need to learn new skills and techniques. Hopefully my other classmates can agree that we all had a pleasant time visiting the Apple Store and were glad to spend the time on the field trip.

Uploading Videos to your Blogger Account from the iPad.

by Allie Fasold 2016

Many student have been required by different classes to make a blog and upload videos in order to share their projects. One problem people faced was being able to upload a video to their blog from the iPad. In order to add a video to your blog you must first upload the video to YouTube (You must have a personal account in order to do this.) After you upload the video and give it a name, you can go back to your blog but only from the browser NOT the "Blogger App". When you are on your blog click "New Post"if you have not already started creating your post. Next, on top of the document to the right there is a video symbol. Click on the symbol where it will bring you to a mini YouTube page. Next, click the "My Videos" tab and your video should come up. Click on the Video then press the blue " Upload" symbol. Finally, the video should be added to your new post.  


360 Videos

Youtube's 360 Videos


by Chris Rybicki 2016

All the time people discover new and interesting features that you can do with the iPad. Sometimes this is a new app, or a convenient shortcut - but for me yesterday, I had discovered perhaps the coolest feature on one of the apps I knew inside and out.

This app is YouTube. As the world's hub for video content, I use the platform a lot to watch videos related to personal interests and hobbies I have, as well as watching tutorials and lectures for school and news to keep me up to date. But yesterday I found out about the most peculiar feature - 360 degree video.

Though I had heard of this feature before, I had believed it only worked on new phones, and had never tried it with the old iPad. So when I saw a video mentioning it, I quickly found some videos to try it out with and it worked! It's quite interesting to use - since you have a complete view around you, it feels more immersive and realistic. By tilting and rotating your iPad around you, you have a special "lens" through which you watch the video, responding accurately to your minute wrist movements.

To get the most out of the feature, I sat in a desk chair that could be spun, so instead of moving my iPad around awkwardly, I could just rotate my chair to go left and right, and only use my hands for rotating up and down. Though it's not quite like virtual reality, it certainly creates a similar feeling through the unique perspective that you acquire.

I definitely recommend that other people try this out. Though it seems more useful for entertainment, I feel like it could be used for school if there were videos showing 3D tours of locations (perhaps exotic countries or simply college tours). Finally, I will link to three videos that I recommend trying with this feature.

YouPlayer

by Matt Amorin 2016
       iOS 9 is here and has made a grand entrance with all of it's new features. Unfortunately, YouTube falls short with iOS 9 as it has yet to get on board with an updated app that is compatible with the new features of iOS 9 such as the undocked video option and the multitasking split screen. However, iOS users are in luck with a third party YouTube affiliate and their app, YouPlayer. Developed by Homegrown Software, the app is a free download from Apple App Store and gives users access to all the new iOS 9 features.

       As shown above, YouPlayer is compatible with the new split-screen multitasking option. This allows any iPad user with and iPad Air 2 and up the ultimate way to watch a video and use another app at the same time. As a student in a 1:1 iPad learning environment, I now have the option of watching any video within the app and taking notes at the same time with a different app. Any student will be both excited and relieved having experienced the constant switching back and forth between apps, most of the time having to reload the video and go back to where they had originally left off, making it extremely time consuming. This logical and intuitive new feature will save users time and frustration, especially students. 
       Another extremely useful option is shown above. YouPlayer offers the option of undocking the video and then navigating throughout the rest of the iPad. While the video is playing, you can pause, stop, and exit out of the app. It also gives you the option of re-docking the video and going back into the app. 

       YouPlayer is a third party app. However, it has very little limitations. For example, I have yet to come across a video or playlist that is only exclusively on the YouTube app. YouPlayer also allows you to sign in, view your own profile and videos and also keeps a valid history of videos watched. The app is free and is filled with benefits and great features especially its compatibility with iOS 9. Download it now! Enjoy!

 In app screenshots:


iOS 9 Notes vs. Notability: Which one will YOU be using in the classroom?

by Sarah Amorin 2016


iOS 9 is here - and we're loving the new features! Between the new application split screen, iCloud Drive, and the lowercase keyboard with a fresh new font, we just can't decide which one is our favorite. One of the surprising upgrades to the iOS interface is to the Notes application, which now includes sketching, folders, and the ability to load a PDF in a note. So, the question is, will Notes now be in the running for the best note taking app alongside Notability? Which one is best for the school environment? In this blog post, we're going to explore the features of both and compare the two.


First - let's compare the aesthetic quality of the two. If you prioritize organization as much as I do, you're going to prefer the Notability setup over Notes. Both applications provide you folders, but Notability allows for color coding, better folder organization, and different preferences for your folders. 


Second - which app loads in documents/PDF's smoother? Surprisingly, Notes does allow the user to load documents into the app, just as Notability does. Unfortunately in Notes, your PDF displays in a smaller space and, to the best of my ability, I was not able to draw or add text to my PDF! If you are able to, the option to do so is incredibly hard to find and therefore not very good. What's the point if we can't draw on it?! Notability takes the prize for this category.


Third - our favorite part: the features! It takes a lot of time and practice to learn the features of both applications and, in Notability, we always seems to learn more and more. In the case of features, it seems that Notes has more colors than Notability:

Notability:

Notes: 

In drawing features, both applications have highlighters, color options, undo buttons, drawing, and picture integration. Notes has an interesting drawing feature that allows the user to add a ruler and draw straight lines. It's handy, but Notability allows you to make your own straight lines (and other shapes) in the app as well. Notes also has a thin marker feature, which is no match against Notability's option of changing utensil tip size. And, if we're honest, the pencil feature in Notes simply just isn't very impressive. With Notability, you have a TON of features for your notes. Notability is able to match the features of Notes and include more. Notability also has a better erasing options, different fonts, text boxes, the scissor feature, and different backgrounds of lined paper, graph papers, or colors.  

Notability: NOTICE THE FONTS!

Notes: 

Overall, I love both applications. Whether you're using Notes or Notability, both applications are user-friendly and always backed up by either iCloud or Google Drive. In my opinion, I think Apple did a fantastic job of upgrading Notes and making it better (and more relevant). I am a true fan of Notability, but even I will admit that Notes does put up some tough competition. In terms of school work, I stand with Notability. Notes is fantastic, but seems like it will always be an app to go to when you need to make a quick note or sketch. When it comes to creative use, organization, and long term note-taking, Notability certainly wins. 

Quick Shot!


by Leo Shattuck 2016
Get this app while it is free!

This app easily allows you to manage your screenshots. After you take a screenshot, it is accessible in the menu bar at the top of your screen, so when you would like to drag it to a file, you don't have to move all your windows just to simply access the desktop. This is free for a limited time so act fast!

Here is how it works...


1. Take a screenshot.


2. It appears in the menu bar where you can access it. 

3. You can drag it to a document. 

4. Then the image appears in the document. 

I would recommend this app to everyone as it is a time saver, and just makes life easier. Download now while it is still free!


At first, the app can be difficult to understand, but this is what I learned from setting it up:
1. After you download the application, you must open the application from the Applications Folder. 
2. After opening ScreenShot, you must select where the screenshots are being saved to so the application can access them. 

After that, you can start to use the application!

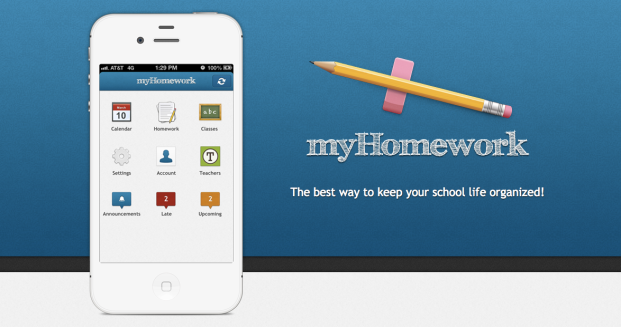
Organization Tip: MyHomework App

Staying organized is crucial to being successful and being less stressed in high school. Going through high school I have been in a 1 to 1 iPad program, meaning every student and every teacher has a device for their own personal use. Over the years I have realized that iPads are great for organization, they allow everything you ever create to be accessed at the touch of a screen. Homework can sometimes be hard to keep track of, all the different classes and various due dates can be difficult to remember. So to help myself get through the stresses of homework, projects, and essays in high school I utilized an app by the name of “MyHomework”. This app is great when it comes to getting everything written down and keeping it organized. I always knew exactly what I had to do that night for homework and I was also reminded of future assignments that were creeping up on me. I could plan my time wisely for projects in the future, setting reminders and giving myself extra time to get it done in advance.
Taking AP Biology my junior year was a huge step in my high school education, the workload was intense and homework was never ending. Due to “MyHomework’ and other organizational tools I was able to keep track of all my labs, homework, and test dates. This app really can help you get better grades, but that is if you use it wisely. We have all experienced the embarrassment of getting a zero for a homework grade because you forgot to write it down, and therefore you forgot that it was assigned. Fortunately with this app and the right applied organizational skills you will NEVER unintentionally miss a homework assignment. Having successfully made it through all four years of high school I would strongly recommend this app to anyone who struggles with missing homework or forgetting dates and even to the students who are on top of everything, it is useful for everyone and such a great asset.

Another Cool Chrome Extension

by Leo Shattuck 2016

History Analysis

This Chrome Extension is for those who like numbers, charts, or even those who just what to see what websites they have visited. This Chrome Extension called History Analysis will track your web sites, and give a pie chart illustrating which websites you visit the most. The nice part about the app is that even right after you download it, you can open it up, and it immediately can reflect your web history. 

Here is a picture of my history, and for this whole year, I used Google Drive almost two-thousand times!
I recommend this app to a family who is trying to manage their kids computer times, and also to see what websites the family has been browsing. 
This app is great, and I would recommend this app to everyone!

iPad Usage: Then & Now


My sophomore year was when we first got the iPads for our school. At first I thought it was kind of silly , but I was also kind of excited. Now, three years later, they’ve become invaluable. I write all of my essays on it, I write compositions on it, and I even have the scripts to three musicals I’ve been in on them. I cannot believe how I got along freshman year without this device, it is convenience at its finest. Some of my favorite apps have included Pages, Zite, and Adobe Reader. Pages is where I wrote all my essays in my last three years of high school. I love how simple it is to write papers and export them to wherever you want. Zite is where I get all my news. From world issues to the latest in video gaming, it keeps me informed and up to date. Adobe Reader is where I edited all of my scripts and other documents for school. You can write freehand, add text, or convert files from PDF. It’s been incredibly useful. This iPad has worked wonders for me, it’s helped me become a better, more organized student. I hope that more and more students can be exposed to this wonderful experience.

Grammarly: My Personal Proof Reader


Have you ever written an essay and needed to have someone proofread your work, but no one is around?
Now with this new google extension, Grammarly, you don’t need another human to proofread your paper. This extension is a life saver, I’ve written essays that, to me, look flawless but then I plug into Grammarly and I soon realize that my first assumption was quite false. Grammarly seems to do everything. Spell check is great, I have found that it has not missed anything like a basic Word spell check could miss. Along with spell check, it also includes grammar check and a plagiarism guard feature. Hopefully plagiarism won’t be a factor but accidents do happen and it would be a lot better for you to catch it before the teacher does. With this extension life is made easier, your work quality will increase, and you will feel more confident in your writing. I would recommend to every student to look into this and utilize it for their benefit.
grammarly-logo(This post was checked by Grammarly)

Notability vs. Penultimate

by Leo Shattuck, 2016

For the past week, I have been experimenting with two different note taking apps on the market, and I have compiled a comparison of the two.

Notability: I have been using the app Notability for about a week now, and here are some of the highlights I have discovered. 

A sample of what Notability looks like.
  • In Screen writing: This tool prevents your hand from smudging the screen and interfering with the touch screen as you write. It allows you to write, and when you reach the end of the iPad screen, it move the writing field to an available position allowing more notes to be taken easily.
  • Has a microphone tool for recording lectures, or other notes.
  • Has different writing strokes, colors, and sizes. 
  • Has a highlighter, different colors, and sizes.
  • Has a cut, paste, and manipulate tool. 
  • Has an eraser, very plain. 
  • Has a pointer, can manipulate the screen without touching other media. 
  • The app can add photos, can write on top of photos. 
  • The paper can have backgrounds, with different colors, lines, graph paper, and detailed borders. 

Penultimate:
As for Penultimate, the app is free on the app store, and it is an app that allows for note taking. It can separate files into subjects, and different folders. The only down side, right off the bat, Penultimate cannot upload, and annotate PDFs in the app.
Here are some highlights.


  • Zoom in screen writing, can scroll constantly allowing for no skipping and pausing between, when space runs out.
  • Has a pen with different sizes, colors, and strokes.
These are a few of the selections for pen stroke, and color choice.
  • Has an eraser, depending on the speed of erasing, the size of the eraser changes as well.
The above picture is an example of the erasing in Penultimate, I started slow in the bottom left, and increased the speed of my erasing towards the top right corner. The quicker my stylus had moved, the wider the eraser had erased the ink. In Notability, if you touch any part of a line, the entire line itself is erased, not just that part of the line. 
  • Can add photos as well. 

Conclusion:
The overall functionality of both apps is fantastic, the design is nice, and most of the functions are intuitive, and do not require much assistance from the help section. Personally, as a high school student, I would choose Notability as my app of choice because it can upload, and annotate PDFs. That is the selling point for me, it is a combination of a note taking app, and a PDF annotating app, it is really a great app not only for school, but for work use too.